Exploring CLI Development
oclif and chalk makes CLI tool development easier


For long time one of my wish list is to get started with CLI tool building in Node.js. I was checking AsyncAPI github repo and found they got CLI repo. Thought I can contribute to that repo. But on first sight I was feeling it difficult to understand fully. So thought of some other CLI building tool which is easier to get started and then can contribute to AsyncAPI. AsyncAPI was using ink . During my search I came across oclif which is written by developers from Heroku. I tried reading their docs and it was much easier to get started.
In this article I will be sharing about writing your First Node.JS based CLI using oclif.
Dependencies
- Make sure you have install stable version of Node and NPM.
- Then we should also have to install oclif package
Creating First Multi Command CLI
First command to run is npx oclif multi multicommandcli
In this we are saying we are going to create the multi command CLI and it will be inside the folder named (multicommandcli)
A series of question will be asked when the above command is run
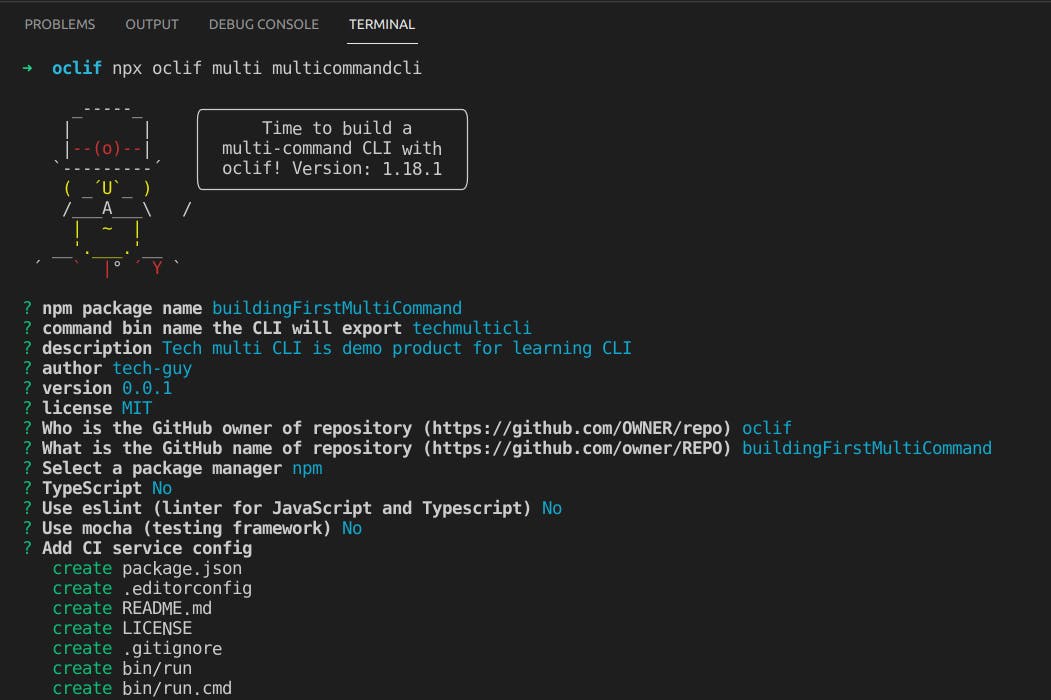
- The first question is the NPM package name when it is published, mostly to npmjs.org
- Second question is important, this will be name which we will use in our system wide when we are publishing it. This is our CLI name (its like oclif in above installation step)
- Third, Fourth and Fifth are self-explanatory we should give a short description, then author name and version of your CLI tool.
- Six related to Github owner name, give your github usename; Seventh is repo name where you have hosted
- Eighth is using npm vs yarn (I am comfortable with npm); Ninth is between Typescript vs Javascript coding for this CLI.
Once all the questions are hit, the folder with name multicommandcli will be created. You can open in VSCode and help.
Next before running, I would always suggest to run npm install. The next step to run is `./bin/run
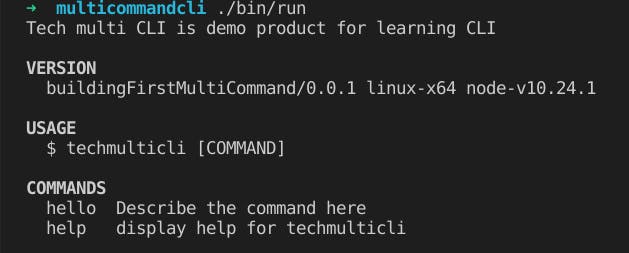
Basically the command running is inside hello.js file
Creating New command
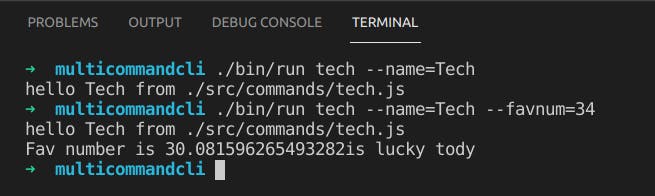
Lets consider we are going to create a new command call tech for our CLI so our command will become something like multicommandcli tech . . .
For this just create the new file tech.js inside commands folder and modify accordingly

Note:Since we have not linked this CLI to our system we are still using ./bin/run
Creating New Flags
Till now we are working with the defaults flags; we can also easily create new flag for our command.
First Step is to define the Flag in the list
TechCom.flags = {
  name: flags.string({char: 'y', description: 'tch to pring '}),
  favnum: flags.string({char: 'fn', description: 'fav number to pring '}),
}
Second step
Start using it
 if(flags.favnum){
    this.log(`Fav number is `+getRandomNumber(flags.favnum)+`is lucky tody`)
  }
Note: Flags are not positional, we can interchange the position and use them too
What is CLI without colors
Those days in movies, they will show black terminal with green color text; every kid out there had wishes they can work on those system and other will see them as nerd. One such kid is author of this post.
To add the colors to our terminal text we can use chalk npm library. It can be easily installed using following command npm install chalk
Import colors needed
First step is we should import the colors which we will use in our program
const {yellow, green, cyan} = require('chalk')
Use it in logging as required
if(flags.favnum){
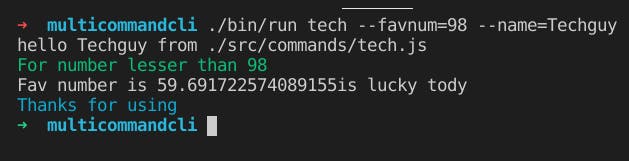
this.log(green('For number lesser than '+flags.favnum))
this.log(`Fav number is `+getRandomNumber(flags.favnum)+`is lucky tody`)
this.log(cyan('Thanks for using'))
}
Here I have used only two colors. When I run the below will be the output
Linking with System
Till now we have been using the local run command to test this CLI. Now its time for us to link with our System and use it from anywhere whenever required.
First step is to run npm link (if required use sudo command based on your user privileges)
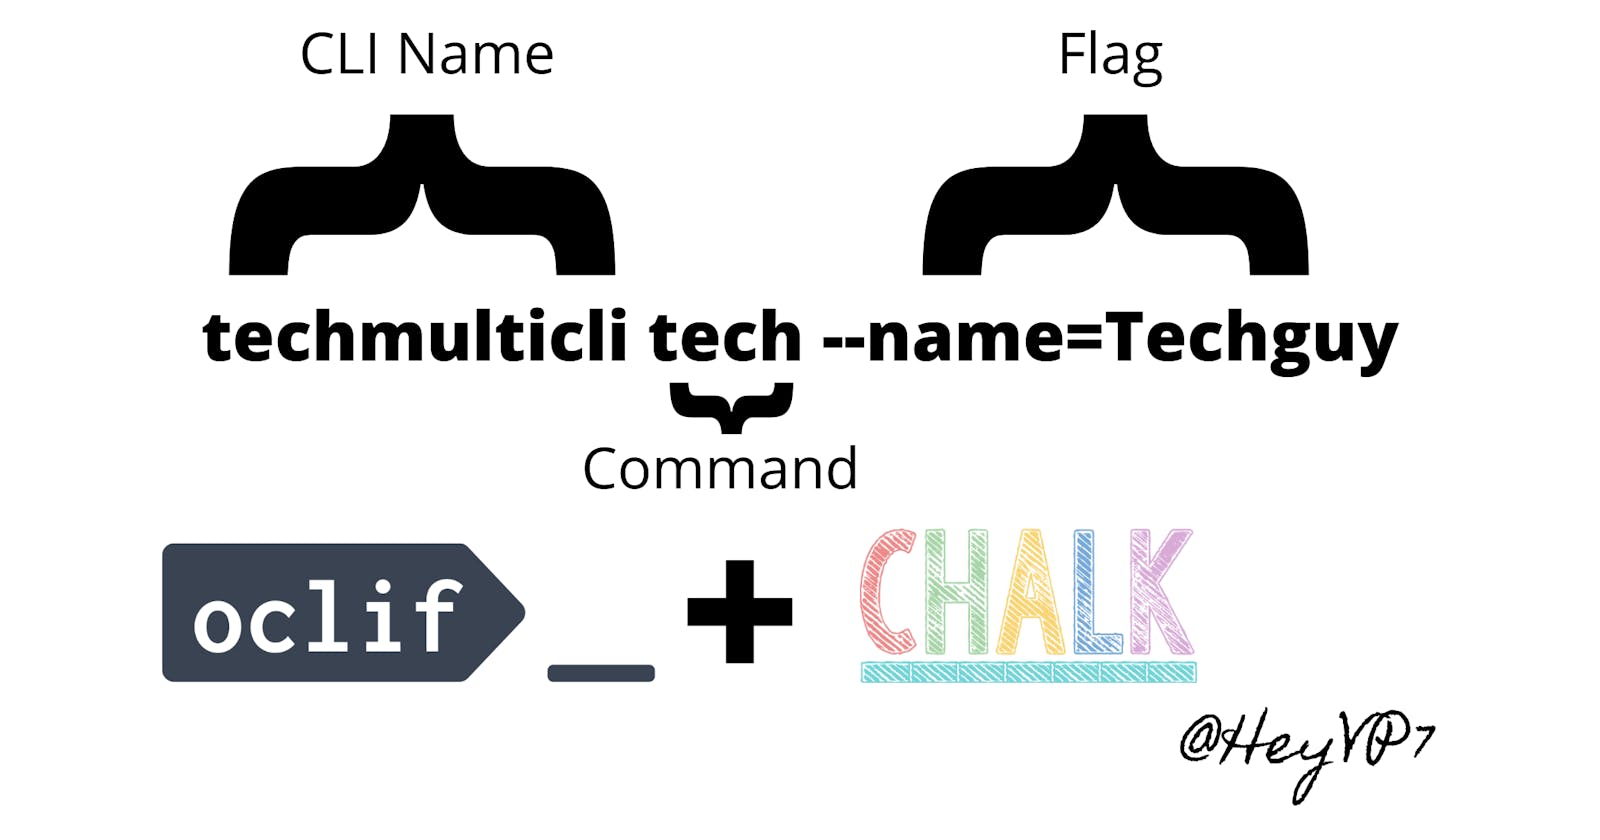
Then we can run like this techmulticli tech --name=Techguy --favnum=98, remember our second step we gave the bin name like techmulticli so this is our CLI name and it should be used.
This article gives basic idea how to get started, there are lot more to explore. Stay tuned!!